How to Make a Sheath Dress Pattern for Your Evangeline Ghastly

Greetings and salutations, Internet-Land! Last year I posted on the blog how to make your own pattern for a Tonner Matt shirt (wow ~ that sounds like I’ve been doing this for ages ~ heeheehee). It seemed to be very well received, so I thought I’d do a similar one to kick off the new year. I have an up-coming doll show at the end of this month, and have been getting some of my coats ready to display. I like to sell the long coats with a simple sheath gown. I have already made the pattern for Ellowyne, but hadn’t done one for Evie yet. As I was preparing, I thought, “Why not just put the process on the blog?” So, I grabbed my handy little camera and went to work. Last time, making the pattern and then sewing it were in two different blog posts. This time it’s all in one, since sewing the first one will show the corrections I need to make in order for the gown to fit correctly. Since Matt has no bust line with which to contend, his torso is a lot easier! You can follow these steps for any doll, so strap in and get ready for the ride!

MAKING YOUR SHEATH DRESS PATTERN

First ~ the supplies. I gather together the doll I need to fit, paper, scissors, some non-stretch scrap fabric, pins, pencil, ruler, and a measuring tape.

102_1401

Now to start. I first measure the bustline and wrap the non-stretch fabric around the doll. I cut the fabric, leaving about a quarter inch “pinch” at each edge to allow for the back seam overlap where the snaps will be sewn. Then I pinch and pin the excess for the waist at two sides in the front and two sides in the back. This will indicate where the darts need to go. Then I draw pencil marks on the full bustline & waistline and at each side of each “dart.”

Now I open up the fabric and extend the bustline and waistline markings. Then I mark the dart lines onto the waistline and bring them to a point about one half inch lower than the full bustline. I make the back darts (the ones to the outer edges of fabric) slightly smaller. These markings are now ready to be transferred to the paper. For Evangeline, I chose 8.5×14 size paper, because she is so tall. I folded the paper in half length-ways & marked the center. From that line, I drew in the waist, bust, and darts for the front of the dress. Remember to divide your total waist into four sections, as you will only be drawing half of the front and one of the side-backs. (The front will be folded down the center & both sides  of that piece cut at the same time.) I used centimeters to measure and mark the darts, as the lines of measurement were more accurate than trying to divide inches into 16ths.

Next, I measure Evie’s hips and make sure to indicate that on the paper. Then I draw the length of the dress. You can make it any length you like. For this gown, I am going to choose a full length with a slight train in the back, so I add the flare I want and go slightly longer on the sides. IMPORTANT!!! Now ADD a quarter inch seam allowance on the outside of every line!!!! Then I fold it length-ways and cut.

Now I am ready to make the back piece. Keeping the front folded, I place the center about a quarter inch from the center of a new folded paper. This gives me seam allowance for the back, since it is two pieces that will need to overlap. I then trace around the edges (since my first piece already included a seam allowance). I raise the neckline for the back and slightly extend the outer edges of the arm holes for more coverage in the back. Now transfer the waistline and the darts from your fabric markings, making sure to keep the distances the same from the side edges of the fabric & the center back of your pattern (measuring from the actual sewing line rather than the seam allowance line). Remember, the outer sides of the fabric were where you closed the fabric at the doll’s back. Now for the hemline. From the sides, I draw a line down to the center for my train. One small hint ~ where ever you have seams meet (like at the sides or center back), it it good to leave at least a quarter inch of slightly level horizontal line. It may look weird, but I find it’s easier for me to have this little seam allowance level. Now cut out your back piece.

Now you are ready to make the facings for the neckline and arm holes. Just trace around the edges of your pieces and come down the center and sides at least one and a quarter inch (I used 3.5 centimeters). Then gently curve the line from the side up to the center for the front and down a bit from the sides to the center back as shown in the photo. For the front facing, you can cut on the fold just like we did for the front of the dress. The back piece will just be one side of the back. Now your pieces are ready to do a sewing test run!

SEWING YOUR PATTERN

**My patterns use 1/4 inch seam allowance, and remember to back-tack at beginning and ending of seams.**

To try out a pattern, I first always pick a non-stretch fabric. I want to know how the pattern actually fits before trusting to stretchy fabric. I pulled out some cute printed cotton/poly blend that does not have any “give.” This way, if it works ~ great! ~ if not, it’s no big deal to scrap it. I lay out the pattern pieces length-ways with the grain of the cloth, placing my folded front pieces on the fold of my fabric. I just like to do this, as it makes for less cutting and more accuracy with the evenness of my front sides. Once the pieces are cut, I indicate my dart markings onto the wrong side of the fabric. Now if you’re an experienced sewer, you can just indicate the dart points. If you’re a beginner, it may prove useful to draw the entire dart. To sew, you fold the fabric (right sides together) length-ways down the center of the dart and sew from top point to side point and then down to bottom point. Sew all four darts on the front and back pieces, then joint the front and back pieces (right sides together) at the shoulders. Do this step with both the dress pieces and the facing pieces. When I place the darted front up to my doll, I can see that I will need to adjust by adding more darts for a better fit (you can see it in the photo by my finger), but we’ll get to that later. For now, I’m just staying with the pattern as it is.

I also like to top-stitch my shoulder seam allowances down, as this makes it easier for turning right-side-out later. Next, I finish the lower edges of my facings and the center back edges of my back pieces. I have a serger machine, but you can also do this with a small stitch-length zig-zag. I do NOT hem the facings, because a hemline will often create enough extra bulk that it will show through the front when the garment is finished.

The next step is to sew the facing to the garment. Line up and pin the neckline and the arm hole edges and pin in place. You will now sew the center back edge-neck line-center back edge, and the two arm holes. DO NOT sew down the sides! Then clip the seam allowances of the neck line and arm holes close to the seam in about one quarter inch sections. This will allow your curved seams to lay nice an flat once you turn it right-side-out, which is next. I used a turning stick, but a small dowel will work. Wrap a small portion of the back hem around the stick and gently slide it up under the facing and through the shoulder as shown. Now the next part is important ~ CAREFULLY pull the fabric all the way through the shoulder opening. This can get a bit tricky if you try to pull it through all at once. Each time you pull some, gently adjust the remaining amount so it’s not all bunched up. That makes it much easier. If you try it all at once, you risk tearing both the seams and the fabric.

Now you will see why we didn’t sew down the sides of the facing. It’s time to put together the sides of the dress. With right sides together, lift up the facing and start by matching the arm hole seams. It’s more important to match the seams than the hems of the facings. Then pin the sides of the facings and gown, making sure to match the curves of the side. I stitch this on my sewing machine and then finish the edges with my serger, since this edge will be exposed. Again, you can do this or zig-zag. I just prefer not to have any raw edges showing in my garments. Once the sides are sewn, I pin together the center back and sew a seam that starts about one and three quarter inches from the hip line. When I start, I double back-tack, as this is where the doll will go into the dress, and it needs to be extra secure. Sew from there down to the hemline. It’s important not to sew too high up, or you will not be able to get the doll’s bum and hips through the opening of the waistline. The pen is pointing at my starting place. Now press the facing down at the neck & arms, making sure your underarm seam allowances are all nice & flat.

It’s time to try it on the doll. As you can see in the photos, her bust line is ok, but it leaves large gaps by the arm holes. I will add darts to close this up ~ pins are in place. The back is problematic as well, so again, I will add in darts to fix it.

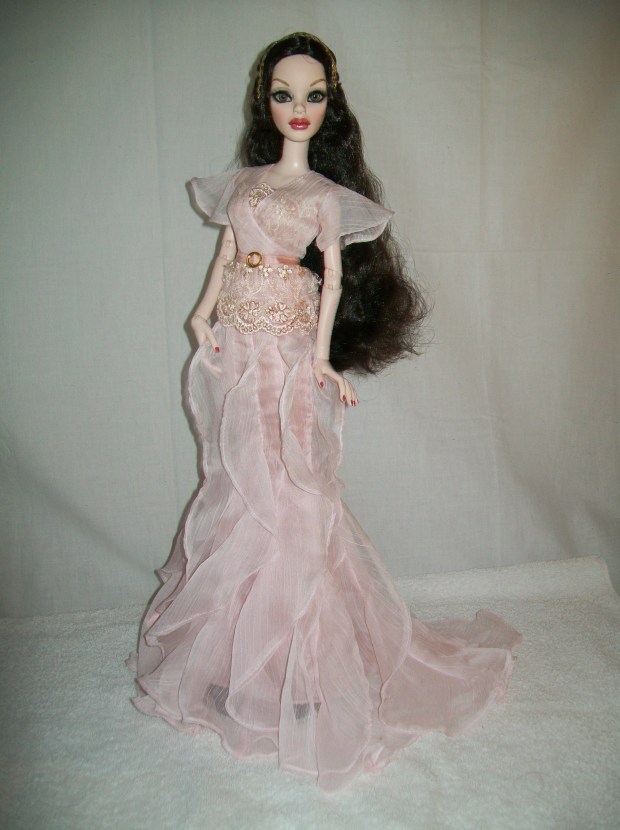
Now that I added in the darts and hemmed the dress, it’s a good fit.

My next step is to correct my pattern pieces. I indicate the new darts onto the front. The back is a bit more tricky. I indicate the darts I added and folded the piece down. But this would be far too drastic of a shape change. Then I drew in the adjustments I wanted and added in the needed dart so my sewn sides will match up correctly. I also dropped the outside edge of the shoulders and added a bit more flare to the skirt. Lastly, I made a new back facing piece to match the new pattern. I also noticed that it would be a nice option to have an open V-back, so indicated that on the pattern piece and made a facing piece for that option. Once the pieces were made, I gave it another run with new fabric. I followed all the same steps. This time I was happy with the pattern, needing no further adjustments.

To finish, I used three snaps to close the back of the dresses. Now they are ready to be shown with the accompanying coats!

I hope you have enjoyed this tutorial, and that it has been helpful for you. My “refined” pattern is now available at my facebook page:

http://www.facebook.com/missysimaginings

Wishing you a great and wonderful week! ~ missy

Merry New Year!

Well, here it is, Internet-Land, we’ve made it through 2016. Another year has passed, and we look forward to a new beginning. As I was transferring some data from my old planner to  my new one, I found a page on which I had written out some goals for 2016. I was so pleased to find that I had actually accomplished all four of them. (Remember ~ I never make big, unrealistic resolutions.) First on the list was to design a set of fairy paper dolls. Not only did I complete the printed set, but have had so much fun adding to it with exclusive dolls and outfits just for you, my internet friends! Secondly, was to select items from that set to make into real doll clothing. This one wasn’t as abundant, but I did make one into an outfit, and it has sold. (I still have four more to make of that design, as it is a limited edition of five.) Thirdly, was to choose a name and logo for my very own “brand.” I am still pleased with my choice of “Missy’s Imaginings,” and still love my hydrangea design. One of the highlights for this year was finding the beautiful hydrangea fabric for my doll show table skirting. Lastly, was to start up a website or blog. Happily, this turned out to be a two-in-one project. I am tickled that not only did I start this project, but have faithfully posted almost every week. This is my 40th blog post for 2016!

Sometimes it’s easy to get discouraged when looking over a year and seeing all the negatives that may have presented themselves. As we come to the close of 2016, take some time to look at the positive things you’ve experienced. Maybe you took a vacation. Maybe you met a friend. Maybe you changed a job. Maybe you had a really fun day with your children or grandchildren … or great grandchildren. Maybe you added to a collection. Maybe you found a super good recipe. It could be anything ~ big or small. Just think of all the good things that came your way this year. Then think, “How can I make more of that good stuff come my way this year? How can I direct more good stuff towards those I love?” Tonight as we count down the minutes to 2017, let your sights be set on those things that are good, lovely, true, pure, and virtuous. You CAN direct your path for 2017 ~ Wishing you a Very Merry New Year!

Maggie’s additional New Year’s outfit can be found at

http://www.facebook.com/missysimaginings

maggie-8

Steady there, Parnilla, steady!

Greetings & salutations, Internet-Land! I hope your Christmas was great, and I wish you all the best for a very Happy New Year. To help myself celebrate the coming new year, I have acquired one of my all time favorites ~ Beautiful but Deadly Parnilla by Wilde Imagination. She’s stunning! I was a little sad to find that her waist was very loose & floppy (but NOT broken like my September Mourn). I looked up some ideas on possible ways to steady her lower waist joint. The best one (to my mind) was to shim her by inserting some layered clear adhesive tape to the lower front & back torso, thus making her joint more snug. I did not, however, like the idea of adding adhesive to my doll. Once the tape wore out, how would I get the old sticky stuff (which always looks dirty when old) off the body? After considering this, I came up with my happy alternative. Instead of tape, I got some clear thick vinyl! I cut a small piece and was able to gently wedge it into the joint back just above her bum. Voila! It worked like a charm. Now you can see that I can hold her almost horizontal, and she still stays straight! If and when I ever need to replace it, I will simply remove the old one & slip in a new piece ~ NO sticky mess. And that’s not all! This weekend (hopefully tomorrow for New Year’s Eve) I will be posting another holiday set of gowns for Maggie here and on my facebook page. Stay tuned! Until then, here are some pics of “Steadying Parnilla.”

102_1389

It’s Christmas Eve!

Ho-ho-ho, Internet-Land! It’s Christmas Eve ALREADY! I will confess, this year it has come MUCH too fast. I am in no way ready for the holiday. With long working hours, I have not had time to prepare and must now brave the stores on Christmas Eve day. I am determined, however, to make it into a glorious adventure! I think I know what I want to do, and it will not involve any “you waited too long, so now they’re all gone” items. I will not be in a hurry, so can take my time this late morning and early afternoon to just enjoy the journey. Then tonight, I will pop in one in of our classic Christmas flicks, make a couple pies, wrap some gifts, and thoroughly enjoy the evening.

So, to all of you out there who may be facing the same dilemma ~ here it is ~ embrace your day. Don’t make yourself miserable wishing it is something other than what it is. Do what you can with what you have, and let your own situation be enough. If this year is one of those times when you think there just “isn’t anything to give,” think again. You have lots of value in yourself! Literally, take out some sheets of paper and write your loved ones a letter, telling them how much they mean to you and why. Fill your note with love and thankfulness, making your words into a gift that will be treasured always. One of my most precious possessions is the last birthday card my dad sent to me before he passed away. It’s not the card itself, but the fact that he picked it out with his crazy sense of humor and sent it to me.

This Christmas, know that you are special; you are important; and God absolutely LOVES YOU! You are valuable to Him and to others. This Christmas, just share yourself!

maggie-4

Another gown awaits on my facebook page as well! Happy, Happy Christmas!

http://www.facebook.com/missysimaginings

Happy Christmas!

Hello, hello, Internet-Land! So, as promised, here is my weekend post. It’s been a reeeeeally long couple weeks ~ 55 hours each ~ sewing away on industrial sewing machines and driving on the ice and snow. Wow. I can’t believe I did that ….

But, none the less, here is a new paper dolly to keep you company. I’d like to introduce you to Maggie! Here is her lovely Christmas gown, and her other Christmas outfit can be found on my facebook page. Enjoy!

http://www.facebook.com/missysimaginings

What a Wild Month!

Hello, Internet-Land! WOW!!! What a whirlwind month this is turning out to be. As I said on my facebook page, my hours at work are ever increasing, so I totally missed last weekend’s post. The company where I work is just swamped with business right now, and as my new supervisor said today, “It’s a good problem to have.” I remember the times in my younger days when lots of people were out of work and really struggling, so am very thankful for a good job with lots of work for down the road. At the same time, I have been using most spare time to REST! Know, however, that you are NOT forgotten, and tonight I wanted to post a fun Christmas color sheet to brighten your night. As always, just “save as” or “copy & paste” to print & enjoy! 🙂

It’s DECEMBER!!!!

OK ~ so, I love the month of December. Not only is it time to enjoy all the wonderful Christmas events that seem to fill up every weekend of the month, but for me at least, it’s always been the month that gives a sense of “closure” to the year. I’ve never been big on “New Year’s Resolutions,” because I would always seem to grasp too widely for things I will never really accomplish. I mean, if it’s good and do-able, I’ll just try to work it in as I strive for general improvement in life. The closure, on the other hand, has been useful to me in the “moving forward” process. I recall one year when my family went through FOUR funerals all within one week in November. I know it was not an astronomical upheaval; it was just a very difficult time. The Lord got us through it all, but boy, was I glad when that year was finally over! Crossing off the last day of December on the calendar was strangely “cleansing” for me. It was done ~ time to move away from grief and forward with TONS of loving, happy memories. I also love the thought of possible SNOW! Now, where you are this may not be a big deal, or you may even cringe at the very idea, but I love snow. It makes everything look clean … at least for the first day or two. It’s a pain for driving, but extra time, lots of care, and studded snow tires all help in that aspect. I even love the sound of the car mushing through the snow and slush on the road.

With that idea (along with the weather forecast for next week’s possible flurries), I present my first December craft! Here is Mr. Snowman! Simply download by “right click” & “save as” to your favorite app for printing. These are formatted to 8.5×11 size paper, and I will be posting Mrs. Snowman to my facebook page. Enjoy and Happy December!

http://www.facebook.com/missysimaginings

Celebrate!

I absolutely LOVE the Holiday Season. Yes, I know it is very commercialized. Yes, I know the stores go overboard to make a buck. Yes, I know places are over-crowded, and people get pushy and impatient. BUT ~ I also know there is a feeling of excitement in the air. The spirit of thankfulness and giving is more prevalent. Christmas music is playing. If you smile ~ you get smiles back. If you let someone with a full cart go first in line, they look at you with grateful wonder. It’s a perfect time to show in action what the season really means. With so much sadness in the world today, let’s use this Holiday time to ADD JOY to our surrounding humanity! Offer to hold open a door for that mom who is trying to wrangle three energetic children. Pick up the three items that have been knocked off the shelf. Say “Hello” to that senior citizen who crosses the aisle. Give that child in front of you the extra seventy-five cents he needs to purchase his item. Let’s do what we can to make JOY the most contagious bug this year!

And to add to the fun, I am introducing two new Forest Walk ~ Fairy Paper Doll sets for the Holidays. Here is Christmas Splendor. Remember ~ these are designed for 8.5×14 paper. Print this out to add to your collection (doll & other fashions can be found by scrolling through blog or going to “Free Stuff” tab in my menu), then go to my facebook page for the Bountiful Thanksgiving set (and other sets found there). Enjoy & Happy Holidays!  www.facebook.com/missysimaginings

Thanksgiving Is Almost Here!

Greetings, Internet-Land!  This post will be pretty much the same as my facebook post for today, other than the free color sheet. You can visit there for another turkey project. http://www.facebook.com/missysimaginings

There are only 4 more mornings until Thanksgiving Morning! I love this time of year when we take time on purpose to express thankfulness. As a way of saying, “Thank You!” to all my internet friends & visitors, I have another holiday coloring project for you. Just “save as” or “copy & paste” into your favorite application for printing … unless you can just hit a “print” option when you click on the pic ~ then, by all means, just print! (This one is 8.5″x11″) Wishing you a great weekend!

thanksgiving-11

Always Find Some Good

Howdy! Well, yesterday was the Doll Show in Corvallis, OR. It was not the best show I have had in terms of sales (quite slow, actually), but I always like to find something good to share. A while back, I gave this tip in a facebook group, and I thought it may be helpful to someone out in internet-land as well, so here goes! When attending a show, I like to display my handmade clothing by having it modeled by the dolls. This way, collectors can see how the garments will actually fit or how they may compare to another doll of similar body type. This means transporting several of my dolls for each show. Someone asked for tips on how to protect the dolls while traveling. To minimize carrying a BUNCH of individual doll boxes, I put several in one shallow tote box (just one layer), and I use large thick cardboard rolls to protect their hair and faces ~ especially helpful if they have long eyelashes. Then, if needed, the doll/s can also be wrapped in clean white towels for extra protection. Hope this tip is useful for you! 🙂