This was written for a contest, but in mis-reading the requirements, I made it way too long. It had to be revised and shortened ~ REALLY shortened! Here it is in its “unabridged version.” Enjoy! ~ missy
This was written for a contest, but in mis-reading the requirements, I made it way too long. It had to be revised and shortened ~ REALLY shortened! Here it is in its “unabridged version.” Enjoy! ~ missy
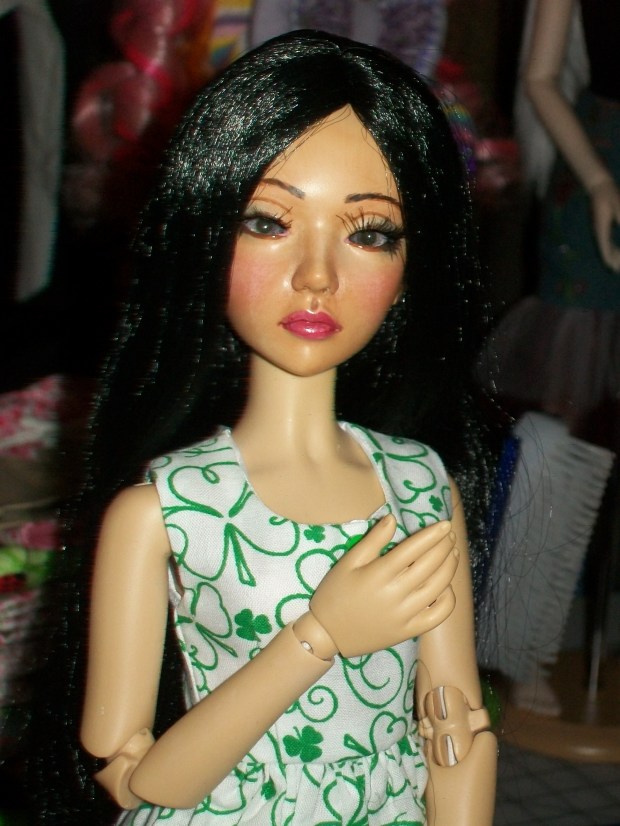
So, I said I would post updates on the progress of my “new-to-me” little Iplehouse Asa. (See the entry, “A New Addition,” to look at her “before” pictures.) I decided to jump in and paint. I also picked up a new type of clear matte spray, but I’ll get to that a little later. First, the painting. After applying a coat of clear matte spray, I brushed on a coat of tan to minimize the blooming on her face. It ended up being a bit too dark, but not totally horrible. Next, I added some darker brown in her nostrils & ears. Then, I used pastel chalks to shade and blush her face. I also used a blue chalk to shadow her eyes. The lips were painted. My problems come with an uneven hand in the detailing. I always end up with too much eye liner and mushy lashes. Still, I did her eyebrows and applied real lashes. I wasn’t 100% overjoyed, but I was content… UNTIL… …


I used the new clear spray to seal the paint. It was SHINY!!!! Aaaaahhhh! Yes, shiny. So now, I will probably clean her face and start all over. The spray was Design Master Clear Finish Matte. Well, not matte enough for me. I had better luck on other dolls with a less expensive Krylon Clear Finish Matte. Will probably go back to that one. I know the highest recommendations come with Mr Super Clear Matte, but I would need to order that one. Nevertheless, I will post her picture with hair just so you can see her. Yes, I know these eyes are too big and look a bit alien, but I have smaller ones on the way. Well, that’s where she is thus far. Will post again when she has another update to share.
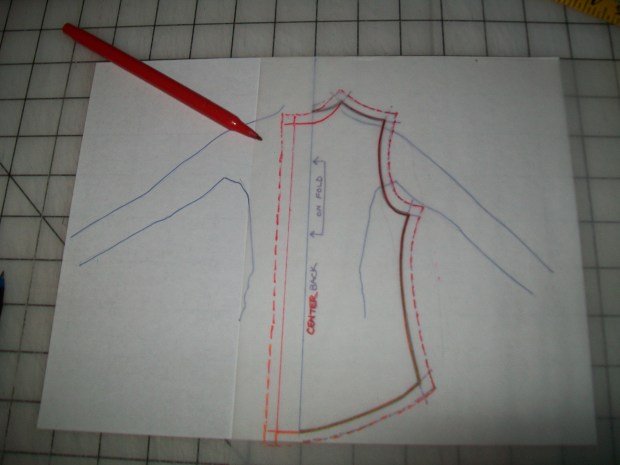
Greetings! I have had lots of people ask me if I buy patterns for doll clothing, or if I make my own. I have used patterns, but most of my clothing is from my own pattern designs. Today I thought I’d show how I go about making a new pattern. This particular pattern will be a basic dress shirt for a Tonner 17″ Matt sized doll. Hopefully you will find this helpful in turning your own ideas into cool realities!
First, lay your doll on a clean sheet of paper, and do a basic trace around the shape. Remember that the pattern will not only need to cover the front & back, but must wrap around the sides, too. I then trace the center line, shoulder edges, and add an extended side edge to account for wrapping around his sides. You can measure around your doll, then make sure that your “side back half” is at least one quarter of the “around measurement.”


Once you have a shape for half of the back, draw the center line and an instruction to remember to place the center back on the fold of fabric. Next, place tracing paper over the back piece, and trace one for the front of the shirt, being sure to extend the center edge to allow for the overlap closure where you will sew on buttons and snaps. (Shown in red for the front & center overlap.) I ALWAYS add on 1/4 inch seam allowance to all the sewn edges. I’m terrible at remembering to add them when I cut, so I add the seam allowance right to the pattern pieces. (Seam allowance shown with the dotted lines.)
Now that the front and back pieces are done, it’s time to make the sleeve. Measure the solid line of the shirt that represents the arm hole, then add 1/4″. This measurement will be one half of the top line of the shirt sleeve. (Mine was 2 5/8″.) Also measure how long down the arm you want your sleeve to go. For this pattern, I will make a 3″ short sleeve. On your paper, make two perpendicular lines. Measure 3″ on the vertical line. At the top of the three inch line, draw a downward curve that measures the 2 5/8″ with the additional 1/4″ added where the line will slightly level out horizontally. Connect this curved line to the bottom horizontal line. Now you can fold on the vertical line and cut to get your sleeve pattern piece.


Lastly, I make the facings and collar. Trace the center edge of the shirt front, and make a curved line from the sew line of the outer shoulder edge, curving down and towards the center all the way to the hem of the shirt. The back facing will follow the shoulder & neck edges, and will be a curve from the outer sewn shoulder downward to the center back. These facings are nice to hide the seam allowances from the shoulders and neck edges where the collar will be attached.
To make the collar, measure the sewn edges of the complete back & both sides of the front sewn neck lines. Make a horizontal line this length. Divide it in half. Make a perpendicular line at the center measuring the height of your collar. I think mine was about 1 1/2″ high, so it has enough height to fold down neatly once my fella is wearing his shirt. Be sure to add a seam allowance. Then fold on the vertical line and cut together so both sides of the curve will match.


Now cut any pieces that you haven’t cut out yet. You should have: Back, Front, Sleeve, Front Facing, Back Facing, and Collar!

And that’s how I make a pattern! If you’re an experienced sewer, and you already know how to sew basic constructions, give it a try! Once you have your pattern, be sure to make it first with a trial fabric. Then make slight adjustments as you need for proper fitting. if you like, check back in, and I will add another post with the sewing steps for this particular project. Thank you for stopping by, and have fun making your own cool patterns!
I’m so excited about my new addition of a tan Iplehouse Asa BJD, MSD size! I absolutely LOVE her joints & flexibility! I found her on eBay for a spectacular price, as there was some slight blooming on her face. Upon inspection, it looks like a faceup has been taken off. This left a slight cleaner residue, much of which was easily removed. Now the remaining shade variations will be easily covered with a new faceup. One photo shows her with a pair of 16mm grey eyes, which seem too large for my taste. I will be ordering a set of 12mm or 14mm here shortly. I’ll post update pics as she journeys to completion.


One of my earlier projects was a Baby Hujoo Suve. I entered a pic-spam contest with her, but sadly, she was not a winner. I still think she is really cute, though, and now that the contest is over, I can post the photo. Here she is guarding my herbs on the front porch. Wishing you a wonderful week! ~ missy

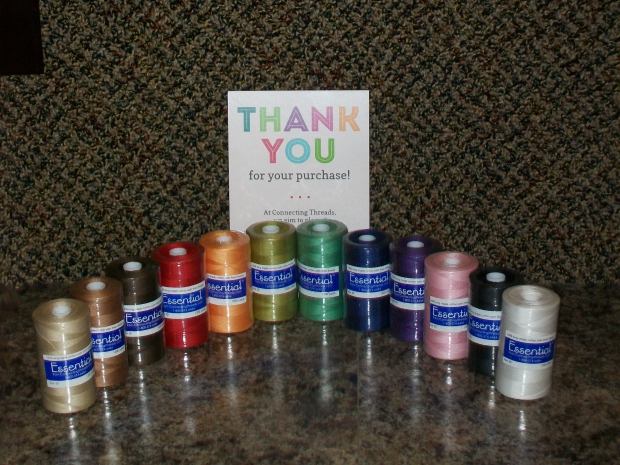
Good afternoon! I am one who LOVES a good bargain. My dear friend shared this with me, and I would like to share it with you. It’s a place called Connecting Threads. They carry beautiful fabrics, quilting kits, sewing tools, and my favorite ~ their wonderful selection of cotton 1,200 YARD thread spools! Right now in the May 2016 catalog, these are on sale for $1.95 each. SUCH a great deal! They also have other thread cones on sale, so check it out at:
http://www.ConnectingThreads.com
So, I’ve had a request for more doll cases (which is always a good thing), so I thought I’d put on a couple pics of their “glamorous beginnings.” My very first case was tall enough, but a bit narrow to have enough room for much storage. I only wish I could still find the black marble design I used on the drawers … sigh. Then I expanded the size and made cases for my daughters. Savannah wanted “cabinet doors” in hers (which I hope to never do again…heeheehee). These were very workable, but a little “over-large.” That led to the final pattern which I still use now. This last fall, I came up with the new Coffin Case, which may still undergo some “tweaking.” I’d like to narrow it just a bit.
I start out with good, flat, purchased cardboard. I want it to be VERY clean; I don’t use a lot of recycled cardboard, as I don’t always know what it contained. This also prevents too many pre-bent creases. Then the pieces are hand cut and assembled, adding different sections of the covering at defined stages. The cases have lot of “down time” while I’m waiting for glue to cure. During these intervals, I work on cutting and assembling the drawers. All in all, from start to finish, a case takes about 36 to 40 hours to make. Well, better get to work!


So ~ here I go, on a new “digital” adventure! I’m Missy & I’m starting a blog & website to let my creativity find new life! This will be a place for all my published projects, doll fashion designs, paper doll collections, “how-to’s” (along with my hard-learned “how-NOT-to’s,” and some free patterns & “misc stuff.”
I’m VERY NEW at all this, so please bear with me as I learn all the bells & whistles of the internet world! I am still trying to get all the pages & features managed and under control. Hopefully, it will turn out to be a favorite place to visit. Thanx for coming & enjoy!
