Good evening, friends in Internet-Land! Tonight I have another tutorial for you. The old saying, “Necessity is the mother of invention,” teamed up with a “cheap-skate” like myself leads to all kinds of economical ingenuity! To display all my fashion dolls, I have found that the saddle style stands are my favorite kind. They slip up underneath the doll’s torso without causing too much rumple to the fashions. They are, however, usually more expensive as well. I have a few that I’ve found at bargain prices, but even the lower priced ones usually have a “shipping” cost attached to them ~ thus bringing the cost up again. After quite a few nights of “building” in my head, I finally had an idea I wanted to try, and I’m happy to announce ~ it worked! Plus, it was really easy & CHEAP to do. So ~ here we go!
SUPPLIES & TOOLS:
Find these items at home: Scissors, pliers, wire cutter, screwdriver, small scroll saw or old serrated knife for cutting CPVC pipe/tubing, some unbent corrugated cardboard, one old, un-readable CD or DVD with great art work (one for each stand you want to make), some old plastic coated wire hangers, some scrap contact paper, some old Christmas light cover caps, and some good sticky glue such as Tacky Glue or Gorilla Glue.
These are the items I bought: 1/4″ flat head bolts/nuts (pkg of four sets $1.28, and you won’t use the nuts), 1/4″x1 1/4″ washers (2 pkgs of 4 $2.30), a 5′ length of plastic 1/4″ CPVC pipe/tubing ($1.49). These items will make four stands and will leave you with CPVC tubing for a couple more as well.

WHAT TO DO:
Step 1 ~ Trace two circles onto the cardboard using the CD/DVD. On both circles, trace both the outside & inside of the CD. Then, make an X through the inner circle, identifying the center. Use this mark to center a washer. On one circle, trace both edges of the washer, and on the other just trace the inside of the washer. Cut out both circles, then cut one with the outside of the washer line and the other with the tiny inside of the washer. Place a washer into the larger hole.


Step 2 ~ Glue the circle with the small hole under the circle with the washer. Then cover the bottom cardboard side with contact paper, leaving the top with the washer exposed.


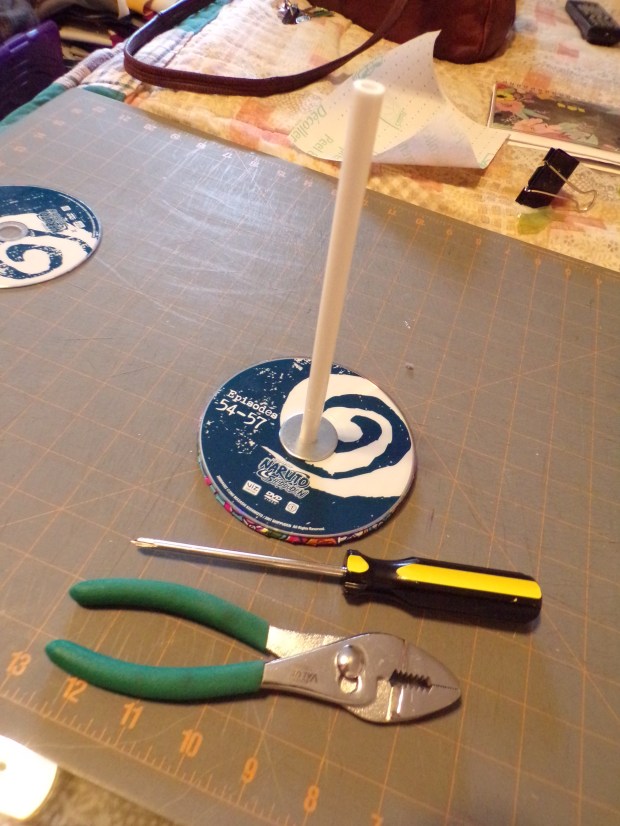
Step 3 ~ Now glue the CD onto the side that still shows the washer. Then glue another washer on top of the CD. I poked the bolt up through the cardboard from the bottom to make sure the holes aligned correctly.


Step 4 ~ Now cut a 7″ length of the CPVC pipe and holding it straight, screw it onto the bolt. The bolt will cut its own threads into the pipe, keeping it secure, but you can insert a little glue into the pipe if you wish. Once the bolt is a good way in, I used pliers to grip the pipe as I screwed the bolt the rest of the way in until it was flush on the bottom.
Step 5 ~ Straighten out a plastic coated wire hanger and cut a 16″ length. Fold this in half, then bend the ends out as shown, with each side having a 2″ straight vertical section, a 1″ diagonal section, and then the rest vertical to the center fold. Glue Christmas light caps onto the ends of the wires. Now, it’s ready to insert the center bend down into the top of the CPVC tube.


Step 6 ~ Now it’s ready for your doll! I hope this has been helpful ~ have fun letting your dolls “take a stand!”


A suggestion on your stand…move the pole toward the back instead of centered and insert the prongs up into the backside of the swimwear or whatever it is the doll is wearing.
Barely visible stand and will keep the doll standing!
LikeLike
Thanx for the idea! I don’t have a way to put another hole neatly in the CD, but if you do ~ go for it!
LikeLike
Love this Idea!! I plan to try it.
LikeLike
Thanks! 🙂
LikeLike
I came upon your video of making this doll stand and love your idea! I’m so disappointed that the camera cut out for the part where you were bending the wire hanger. I would like to know the dimensions to cut it and to bend it to. But most importantly, I would like to see and hear your tips on how to bend the hanger so smoothly and without kinks. I would really like to make some of these stands, but the wire bending has me a bit flummoxed.
Thanks for any tips you can share.
LikeLike
I just use pliers to grip and bend the wire ~ both when straightening the bends from the hanger form and then also to place my own bends. You just have to choose your own bend placement to fit the dolls that will be using the stands.
LikeLike