Sewing Your Shirt for a Tonner Matt

Greetings! Wow. It’s been quite a while since I last posted. It’s good to be back to say, “Hello,” to you all. You may (or may not) be wondering what has taken me so long. Well, we’ve had some MAJOR career changes going on over here! I have a totally new job in a totally new venue, and I’m really liking it! But now I leave VERY early with 10 hour days and a fairly long commute. It makes for a tired old bird at the end of the day! Never-the-less, I have not forgotten you who come and visit. In my last post, I mentioned getting to work on some pants for the Tonner Matt body style, and yes ~ I have TWENTY-THREE pair cut out and ready to sew! I also have a cammo puffy vest, two fancy dress vests, and a flannel shirt all cut out & ready for assembly. (Will post that picture first!)

102_1288

But today’s blog will mostly be the long awaited sequel to my May 22, 2016 post entitled, “Making a Shirt Pattern for a Tonner Matt.” Today I cut out the pieces I made for that blog and put them together. I will give the step-by-step instructions along with photos of my process. I’ve never done an actual sewing tutorial, so please be patient if I accidentally leave out an instruction or two. You may want to go back and read through that earlier post, so you will have a frame of reference for this one. If you’re already an experienced pattern maker and sewer, this may seem really simple, but I like simple.

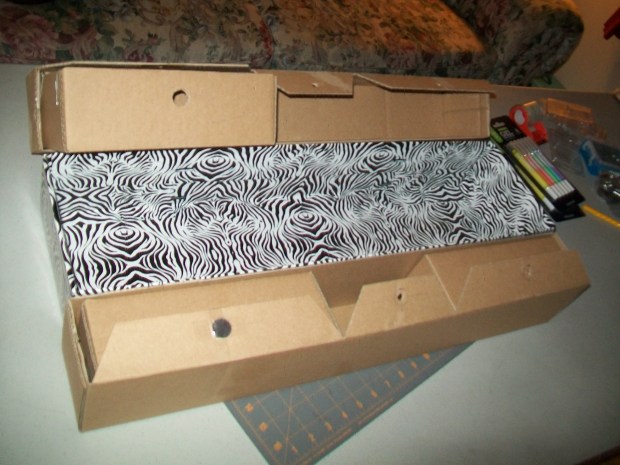
First of all, whenever you are sewing a newly made pattern for the first time, be sure to use some fabric that’s not expensive or important. This first attempt of mine will be on a simple cream colored cotton. Then if it doesn’t work, it’s not a big deal, but if it does ~ I will have something usable. My fabric was just some leftover scrap from cutting out all those cream pants above, so the layout looks a bit weird. I just made sure I could neatly get all the pieces I needed. After the first few pieces were cut, I rearranged the remaining fabric for the two pieces of the collar & the back facing.

Now it’s time to sew! All my doll clothing has 1/4″ seams. I always do my “prep work” first, which is connecting the facing pieces at the shoulders (right sides together) & finishing (serging or zig-zagging) the raw edge that will lay inside the shirt & be visible. I press the seams open, but do not serge the shoulder seams. When making doll clothing. I try to avoid creating unnecessary bulkiness. Sometimes serging can do this, so when I know the seams will be completely hidden, I leave the edges raw. I also prepared a small front pocket for fun. I serged just the top edge that would be the open part of the pocket, then hemmed it. Next, I pressed in all the side & bottom edges before laying it on the shirt & top stitching. Be sure to keep these stitches as close to the edge of the pocket as possible to maintain a good size proportion for doll clothing. Then I stitch the shirt fronts and back together at the shoulders (right sides together). I lay the seams open and topstitch the seam allowances, because I think it gives a nice tailored look.

Next is the collar. Sew the two pieces together at the sides & top with right sides together (leaving the neckline open). Then clip the seam allowance leaving 1/8″ allowance and angles at the corners. Turn the collar right side out and press seams flat. Then stay stitch bottom unfinished edge and clip a small notch in the center of the collar being sure to stay within the seam allowance. Now stay-stitch the necklines of the facing and shirt, clipping small notches to the stay-stitching about 1/4″ apart. This will allow the neckline to stretch out into a straighter line for sewing the collar to the shirt. Next mark your shirt back and back center of the facing within the seam allowances. This will help when you pin the collar to the right side of the shirt.

Here is where it can get tricky. When pinning collar to the shirt neck, start in the center & work out to the sides making sure you have the same amount of shirt front hanging outside the collar sides on both ends of the collar. This pattern worked pretty well, as I had 1/4″ at each end which will be the needed seam allowance for the center seams of the shirt fronts. Once your collar is in a good position, add the facing ~ keeping the right side of the facing towards the collar. Once pinned, your collar should be sandwiched between the right sides of the shirt pieces and the facing pieces. I always start pinning at the center of the collar and work my way across the neck and down both fronts to the hem.

It is also very important to make sure that both ends of the collar raw edge are tucked up tight in the seam allowance of the neckline. I have made the mistake of not checking this, and then I ended up with one side of the collar not anchored in the shirt correctly. It was definitely an “Arrrrggggg!!!!” moment. You DO NOT want to take apart three layers of fabric to re-sew! Now, start at one front hem and sew up the front, across the collar, and down the other front. Remove pins and make sure you don’t have any tucks in the fabric. When you press the seams, the shirt & facing should lie pretty flat, and the collar should be able to stand up.


Now you’re ready to add the sleeves! I serge the bottom edges of the sleeves before stitching the hems. Then (since this is a very light cotton) sew one line of stitching on the top edge of the sleeves with a long stitch length. Slightly ease the fabric together without making it looked “ruffled.” This slight gather is just to ease the upper sleeve edge into the shoulder line of the shirt. As I worked on this particular shirt, I found the sleeve to be slightly bigger than I needed on the top edge, but we’ll address that at the end. (For now, I just adjusted the pucker to fit the shirt.)

Stay-stitch the arm hole of the shirt and clip to the stitching about 1/4″ apart, so the arm line will lay better for sewing. I start pinning the right side of the sleeve to the right side of the shirt at the outside edges and work towards the center of the curve meeting at the top of the shoulder seam, adjusting the sleeve gather as I go to avoid too much pucker in any one spot. I also sew this seam with the sleeve down. This will allow the feed-dogs of my machine to help evenly feed and distribute any extra pucker in the sleeve. Then I check the seam on both sides to make sure everything lays good and flat. I press the sleeve seam towards the sleeve.

Now it’s time to sew the sides. Turn the shirt inside-out and pin the underarm edge of the sleeves and the front & back of the shirt together, then stitch. I also serge this sleeve/side seam, because it shows inside the shirt. We’re almost done! When you have the sides together, turn it right side out to check how it looks.

Now for the hem. First, I serge the entire hem, including the hemline edges of the facing (keeping the front seam allowances towards the facing). Next, I turn the facing at the hemline so that it’s on the outside of the shirt with the right sides together & stitch the hem. Then, turn it back to inside and press out the finished corners. You will see that the hem is now ready to be pressed up 1/4″ and stitched. I always like to re-press the hem once it is sewn. I also tack in the facing at the inside of the shoulders, careful to catch the seam allowance, but not breech the shirt. Now, I lay the shirt out and press the tops and bottoms of the sleeves as well as the side seams. Time to try it on the doll!

And there you have it! Now the shirt is ready for the handwork of adding snaps and buttons. As I mentioned above, I thought the sleeves had a little too much pucker, and they also looked more full than I would prefer. I also thought the shirt could use more room at the shoulders and less flare at the hem. After inspecting the shirt, I made the following changes to my pattern pieces (shown in green). The collar was fine, so no changes were made to that particular piece.

And there you have it! That is how I put together a basic button-up shirt. I hope this has been helpful, and now you’re ready to strike out into the adventure of pattern making and sewing! Thanks for coming!

Back to Work

Well, here it is, a week after the show. Now it’s time to get back to sewing. Up first will be a new supply of clothing for the Tonner Matt style fellas. I need to make more pants! I will be starting with some khakis & off whites, as those have been requested. Then will move on to more of these “tweedy-plaids,” because I have plenty of this fabric. I have also not forgotten the tutorial I am planning for the earlier posted “How To Make a Tonner Matt Shirt Pattern.” Another item coming up will be more of the “leather look” long & short coats, but will work on them as I have time.

I have recently had to make a major career change. I am really liking my new job & all the cool people with whom I work, but it makes for some long work days ~ so my sewing will be saved mostly for weekends. I also have some new paper doll ideas, so be sure to watch for those! All in all, the Lord is very good and continues to bless in so many ways. Wishing you all the best with many thanx for continuing to visit my site!

102_1163

Thanx for Visiting!

I had a great time at the Crossroads Teddy Bear & Doll Show yesterday! It was so fun to see all  of my collector & vendor friends again. Thank you to all of you who visited my table & have now visited my website. I appreciate you spending some time here. As many of you know, I gave away a free printed special edition paper doll at the show. Here on my site there are two more outfits as well as another gal with the same body shape. My facebook page also has two more outfits for you to save & print as you like. I will also be posting more outfits on these sites shortly, so be sure to come back & check!

I also took some pics of my table, so for those who could not come to the Clackamas show, but want to visit another show, you will know what to look for to find me. 🙂 Thank you again for coming & be on the lookout for more paper doll fun!

102_1159

Getting Ready for the Shows!

Well, this weekend I have been preparing for the up-coming fall doll shows. To add some pizazz, I have been working to make all my show presentation match my logo. Was so excited with the beautiful fabric find, and now the table covering & skirting is ready to go! It will be so much fun to have everything coordinate!102_1157

A Brand New Item!

So, in my last post, I mentioned a new kind of doll case. I’m happy to announce that it is now finished! UN-fortunately, I ran out of the cool zebra print, and no one had it in stock any more. Fortunately, I found another really pretty print that I think I ended up liking even better! This case is 26″ (66cm) long and 7″ wide, so will hold dolls of 25″ easily. It carries “duffel-bag style” and has a Velcro closure to connect the handles. The top of the case is made of two hinged sections opening to reveal drawer style boxes that are held in place with magnetic flaps. Inside are two sets of ties to hold doll in place. Also included is the pillow lining that lies under & over the doll for protection. Button holes in the pillow allow for the ties to come through & secure doll. I may in future add a few tiny tweaks to the design, but overall am very happy with how it turned out.

“Just Because…”

I was thinking yesterday, “Zoiks! ~ I don’t really have any ‘news’ to share other than my new doll case design (of which I definitely will post a picture for you), but I already posted that news on my facebook page. I don’t want to have both of these sites be just duplicates of one another, so what should I put on the blog?” And then it occurred to me ~ I can just write something. It doesn’t have to be groundbreaking ~ it can just be something I want to say. I mean, that’s what most blogs are anyway, right? Then I thought, “Hmmmm ~ so what would I want to say? What would be important? What would be inspiring?” Again, I realized it would be ok to just say what I want to say, not what I think people would want to read. So ~ here goes nothing … nothing but “me.”

Sometimes I look over all my irons in the fire & think, “What’s the use? Nothing is really ‘bursting at the seams’ with success. Why do I keep doing it? Why try to meet deadlines for shows? Why try to keep new ideas coming to the surface? It’s not raking in tons of cash. It’s not making me famous.” But I think I know. I am so very blessed. God has blessed me in such great ways. I have two WONDERFUL daughters. I have a great family. I have an awesome church family with amazing, supportive friends. Then, to help make some ends meet, I get to do something I enjoy ~ “I enjoy!” That’s it! I make myself crazy deadlines because I enjoy it. I sew “new items” because I enjoy it. I try to have new posts, pics, & designs for readers because I enjoy it. What a fun reason to keep going! So yes, sometimes I dread changing out the thread on my serger. Sometimes I look at all that cardboard that needs to be cut, folded, covered, & completed, and I cringe. Sometimes I think, “…the designer doll clothes are soooo much cooler than mine…” But in the end, I remind myself that I get to spend some time doing something I enjoy, and it actually produces a little bit of income. In the end, how cool is that?!?!

So, for all three or four people who might actually see this post & then actually bother reading it, know this ~ I am SO glad you came to my site. I am so glad you read my post. I do hope it will inspire you to read a few more. I hope it will lead you to be creative in your own way. I hope you enjoy the pictures and paper dolls. But, at the end of the day, I will choose to be content even if no one comes. I will keep posting. I will choose to be thankful for the opportunity to do what I enjoy. And I will enjoy it.

Thanx for coming; thanx for listening!

102_1147

A Bit of Fun!

OK ~ so, call me silly, but I’m excited about this post. I have another free item for you all! And yes, it’s another “click bait,” because you need to go over to my facebook page to get the other outfit (both are formatted to legal size paper). But THIS time, BOTH sets include WINGS! I got to thinking and surmised what some might have thought earlier, “If these are supposed to be fairy paper dolls, WHERE are the WINGS?!?!” Well, here they are. The other bit of fun about this post is that I have ANOTHER surprise ready, too! At the up-coming Crossroads Doll & Teddy Bear Show, I will be giving away a FREE printed paper doll from this collection ~ “first come ~ first serve” ~ until they are all gone. The important thing about the printed doll is that she will have the same body as this web edition, and will also include a gown on the page with her. (That’s why there are two different designs on the tabs.) This means that for everyone who gets a doll at the show, they will also be able to go home and print out all four additional outfits, plus the doll in my earlier post!

I used to go to a monthly local vendor “Scrap Club” for scrap-booking. I always loved the cute little free items that were handed out to help inspire creativity, so that’s what I want to continue with my pages. I appreciate all my collector friends & clients, and this is a fun way to say, “Thank you!” You can check out the links below for the Portland Doll Show and my facebook page. Thanx for dropping by!

http://dolls4all.com/portland-or/             and            www.facebook.com/missysimaginings/

A Forest Walk ~ Fairy Paper Doll ~ Blossom Rose

Groovy!

Howdy! I hope all is well with you this fine Thursday evening. As I’ve been working on more doll cases (for 15″ to 17″ dolls), sewing fairy outfits, and making new fairy patterns, I realized that my 1/3 scale BJDs have been somewhat neglected. Thus, I decided to spend some time on a new outfit for them. Quite a while ago, I bought some WONDERFUL rainbow colored crochet fabric! I’d never really seen anything quite like it, and knew instantly that it needed to be sewn into a groovy long sweater~coat. So, that’s what we have today! My model is sporting her new purple hip~hugger bell~bottoms, a wild print halter top, and her new favorite sweater! And of course, nothing says, “Comfort,” like some broke~in sneakers! This outfit will be available at my table at the Crossroads Doll & Teddy Bear Show in Clackamas, OR on Saturday, August 20, 2016! Check out the site!

http://dolls4all.com/portland-or/

A Forest Walk ~ Sweet Summer Sunset

So, today I am excited to show the introductory piece for my Forest Walk Fairy Collection! This outfit is the completion of my earlier sketch inspired by our recent trip to California. The set consists of five pieces: the gown, two arm pieces, the leafy peplum belt, and a set of wings. All the dress pieces are hand beaded, and the wings are hand drawn & colored on clear acetate. The wings attach with a clear elastic band over the arms/shoulders. The peplum belt can also be worn as a sort of cape, depending on the weather. 🙂

Special Edition Paper Doll!

Good afternoon! Thank you for stopping by! Today I am offering one of my complimentary surprises. This is a Special Edition “A Forest Walk Collection” Paper Doll. This gown is from an earlier post, inspired by our trip to California. This doll will only be offered free here (see her on the Free Stuff page & download from the Ready To Print page) and on my facebook page. The fun part is that the doll is the same at both locations, but each site has a different gown. They are designed for legal size paper, so just “copy & paste” or “save as” to get your copy, then pop over to the other site for the additional gown, and print them out! I will periodically add more fashions for her, so stay tuned & happy coloring!
www.facebook.com/missysimaginings/