Happy Thanksgiving 2017

Good evening, Internet-Land! I hope you are well. Here in the U.S., tomorrow is our Thanksgiving holiday. As I sit here and type, I am pondering about all the different people who may read my blog. Tomorrow, some of you may be looking forward to large family gatherings. Some may have plans with small, intimate groups. Some may be alone. Some will celebrate the day, while to others it’s just another Thursday. Whoever you may be, and however you may be spending the day, know that my thoughts are with you ~ even if it seems in a very small way. I’m thankful you came to my site, and I want you to know that you are valued. I guess tonight I wanted to take a couple minutes and express gratitude for this strange and amazing thing we call technology and the way it allows people to connect. Sometimes the world can seem big and impersonal, but I hope you feel that you can come here for some fun and cheer, knowing that your visit is appreciated.

Here is a bit of news on the dolly scene. As the Christmas season is approaching, I took a stroll down the store ornament aisle this past week. I was tickled to find two cute items to add to my collection of fun accessories. The first is a perfectly dolly sized parasol, and the second was an adorable lamp! Both items are pictured with 16 inch dolls. Just a reminder that you can often find great doll items in non-doll places! Following the photos are some fun freebies, so be sure to read to the end!

And now, to help celebrate the spirit of Thanksgiving, I present another outfit set for El. It is designed on 8.x11 inch paper. For any of you who may be here for the first time, the El doll (along with other outfits, other doll sets, sewing patterns, & coloring crafts) can be found by clicking on my “Free Stuff” tab in the top menu bar (depending on your device, you may need to click on a “Menu” button first). If you scroll down to the end of the page, you will find the little Girl Bear Pilgrim set that is companion to my last post. Just right-click on the item of choice and choose “save image as” to download & print. It’s all for your enjoyment. Wishing you a beautiful holiday!

El BJD Paper Doll 13

Making the Holiday

Good evening, Internet-Land! I hope you are having a good November. It’s hard to believe Thanksgiving is almost here. I mentioned on my facebook page that I’m “enjoying” some post-surgery issues with my hand, so have not been doing any recreational sewing. I do, however, have a couple items to share today. The first will be my new “birthday gift to me” Annora by Phyn & Aero, along with her finished face-up and hand-painted eyes. I’m not sure if she’ll keep this look, so am waiting to add the final touch of applied eyelashes when I decide. I was so happy to learn her actual size and that I could buy her “blank.”

Secondly, is a tip for holding on wigs. Sometimes I find wigs at shows that are pretty, but may be oddly sized or shaped. I tried the trick of simply putting a white rubber band around the head to add some “grip” for the wig. It works great! I know you can buy silicone head caps, but sometimes the price for one little piece of plastic is way higher than I am willing to pay. I always have a selection of rubber bands, so I just found some small enough to have good stretch, and white ~ so as not to add staining to the head.

I know it’s a few days even before Thanksgiving, but this weekend I worked on getting my Christmas lights up on the outside of the house. It’s silly, but for some reason I just want to prolong the holiday fun this year. Since the daylight gets shorter and shorter, it’s easy to let the literal darkness seep into the spirit. We go to work in the dark and then come home in the dark as well. I decided to start the color of the holidays early, so I can enjoy it even longer than usual. I may keep the lights from November through January or February, just to enjoy the smile they give!

I will also be working on a companion craft to the Pilgrim Bear I previously posted, so be on the look out for that in the next couple days. I hope you have the very best week!

Happy November 2017

Good morning, dear Internet-Land! Wow. Already in the eleventh month of the year. I hope things are going well for you today. Here, I’m just plodding along, but with a silly skip in my step once in a while. Usually, I pass through November, enjoy Thanksgiving, then begin to think about the whole Christmas event “stuff.” Not THIS year! I have already began my Christmas shopping. I know, right?! So ~ here’s where the silly skip comes into play. With only two exceptions ~ every gift I have purchased for someone else has been accompanied with an identical purchase for MYSELF! Heeheehee!!! I’m going to have a GREAT Christmas! So many years have been spent thinking, “Oh, man, what would so&so like?” Not this year. Nope! This year, I have thought, “Oh! I LIKE that! I think so&so would like it, too.” And so I bought TWO! Yes, I’m a nut, but it’s been soooo much fun. I’m even going to wrap my stuff and put it under the tree. I want to get things out of hiding, but if I don’t wrap my stuff as well, the girls will know what they’re getting.

I know there are some who complain every year about the holiday greed and commercialism, but I must admit ~ I jump in with both feet. For me, it’s all about spreading joy and a thankful spirit. I have been so blessed, so I want to share and enjoy. In that spirit, I offer my first 2017 Thanksgiving freebie. It’s a color & put-together Teddy who is all set for the holiday (3 sheets). Enjoy and have a wonderful week!

November 2017-1

November 2017-2

November 2017-3


Happy, Happy Halloween!

Good evening, Internet-Land! Glad you’re here! This week I’ve just went to town with new costume designs for El. Don’t know why ~ I guess I was just inspired by the festive season and all the candy in the stores. In any event, El has SIX more outfits this week to celebrate the dress-up season. Three are here on the blog, but all six will be posted on my “Free Stuff” tab. I would love to see some of your coloring variations if you would like to email them to me. I will NOT pester you with reply ads or anything like that, and will only reply upon request. Just put “El’s Costume” in the subject bar and add a note if you’d like me to post the picture. Please note ~ only designs meeting appropriateness for my blog would be posted.

missysimaginings@gmail.com

Wishing you all a GREAT weekend and a very Happy & Safe Halloween!

El BJD Paper Doll 10

El BJD Paper Doll 12

Happy October!

Hi, again, Internet-Land! YES ~ crazy me ~ two posts in one day! Well, I wanted to get some costumes ready for El to enjoy the holiday, but wasn’t sure what my time would look like today. Happily, I was able to get two sets done. The other will be on the Free Stuff tab as usual. Enjoy & have a great remainder of your weekend!El BJD Paper Doll 8

A FREE Male BJD 65cm Pattern for You!

Howdy, dear Internet-Land! So today, I have a treat for you. This morning, I used the same method as my last tutorial (Making a Fitted Pattern for Evangeline) and made a pattern that will fit a larger framed male 65cm BJD such as an Ipplehouse fella. It will probably be too big for the slimmer guys, such as Resinsoul or Mirodoll. These pieces are for a collared button-up shirt and a pair of pants. The shirt can be made with long or short sleeves, but the pattern does not have cuffs for the long sleeve. The shirt collar can be a stand-up oriental style, or the traditional pointed corner fold-down style. The pants pieces will need to be assembled as instructed on the pattern before pinning onto & cutting your fabric.

!!!REMEMBER!!!

The tutorial explains how these pieces will produce VERY form-fitting pieces, as they are drafted directly from the doll’s body. To make them looser, longer, etc., you will need to tweak the pieces yourself to create your own design. This is just a starting point. As is, it will result in “skinny jeans” and a “short shirt.”

Enjoy!

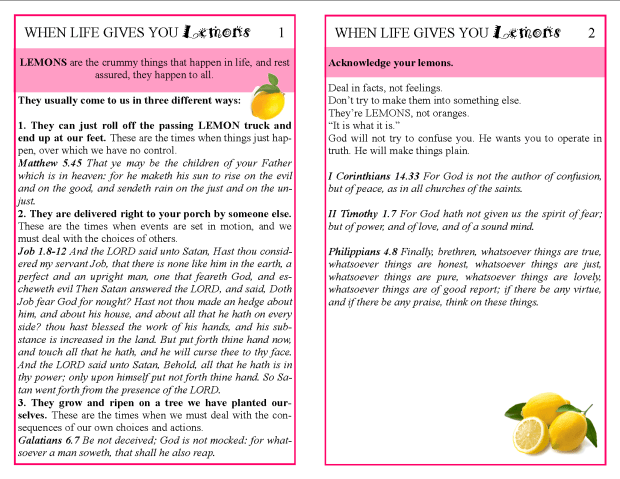
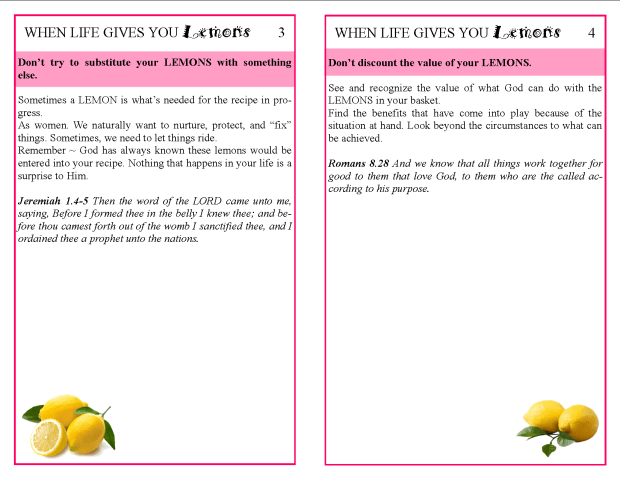
“When Life Gives You Lemons”

That was the theme of our church’s annual Ladies’ Conference this year. I had the great honor to be asked to speak for one of the sessions, and was very blessed to have several ladies say that it was a great help to them. I hope it can be a help to anyone who might be interested! Wishing you the very best!

When Life Gives You Lemons 1-2

When Life Gives You Lemons 3-4

When Life Gives You Lemons 5-6

When Life Gives You Lemons 7-8

When Life Gives You Lemons 9-10

Making a Fitted Pattern for Evangeline

Hello, dear Internet-Land! I know, I know ~ two posts in one weekend ~ shocking, right? Well, I was looking up at my Evangelines, and thought, “I haven’t sewn for these gals in a while.” Then I thought about making a new pattern for her, so decided to share it. Now, I can’t take full credit for the following idea of “how to,” but I have tweaked it to make it more user friendly for my dolls. I saw the idea on the internet a long time ago, but have had no luck finding it again. So ~ if you know who originally posted the idea of using tape to make patterns, please email me (missysimaginings@gmail.com) and I will be glad to add the proper credit to this post. While thinking of this, I wanted to try the idea, but didn’t want to put tape on my doll. Instead, I first covered the doll in plastic wrap. So, let’s get to the tutorial!

This method can be used to make patterns for any size & shape, so have fun with your favorite doll! First, I tightly wrapped the doll’s torso in plastic kitchen wrap. Then I snuggly covered the bodice with cellophane tape. I used the type called “invisible,” because it’s easier to mark this type with a pencil, and lines can be erased & changed if needed. The slicker type is harder to mark. You could also use narrow masking tape.

The next step is to mark the “pattern” right on the doll. I drew around the neck edge, the arm holes, the waist, center, sides, and then the curves between the centers & sides as shown.

Then I cut up the center front & back, cutting through the plastic wrap, but being careful not to damage the doll. I also labeled the pieces. Next, carefully remove from doll & cut pieces apart.

Now I have pieces that are exactly the size of the doll body. These pieces were traced onto plain paper. Then I slightly enlarged each one’s edges by about 1/16th inch, except for the neck and arm hole edges. Since these curve in, extending the edge would actually make the opening smaller, which I don’t want to do.

The next step is to add seam allowance to each piece. I did not add it to the edges that were the center fronts, since these pieces will have that edge placed on the fold of the fabric. I also added a quarter inch to the center back edges to allow for the overlap where snaps will be sewn. And there you have it! Now these basic pieces can be used to draft a multitude of different designs. I used the same steps above to draft a sleeve pattern, and have added a selection of sleeve variations as well as a fuller longer skirt. I hope this will assist you in your own creative endeavors! 🙂


Evie Basic Fitted Pattern 1

Evie Basic Fitted Pattern 2

Evie Basic Fitted Pattern 3

Happy Friday!

Good morning, Internet-Land! I hope your morning is going well. Though, for some of you, it is already afternoon time. In any event, I just wanted to pop in and say, “Hello!” I wanted to get some more El fashions posted last weekend, but was not able to get them completed. I am happy to have two more sets ready. One will be here, and the other (from my facebook page) will be added to the “Free Stuff” tab here on the website. Once these are posted, I have another project to begin today. My daughter is going to Disneyland, and I will be sewing a “Dorothy” dress for her from “The Wizard of Oz.” I guess they have Halloween events during October, so my daughter & her friend are going to dress up for the festivities. That leaves me sewing light blue gingham! I think it will be a fun way to spend the day. Wishing you a fun day as well ~ have a great weekend!

El BJD Paper Doll 6

Black on Black VS White on White

Howdy, howdy, Internet-Land! It’s another weekend with some time to sew and say, “Hello!” I have been steadily making some progress through a very long “to do” list. The first set of items were for a little friend of mine whose parents work where I do. I had told her I was going to make her a surprise, and was happy to have it finished for her. It’s a set of sporty clothes to fit an American Girl doll. The next is a brown pieced jacket to fit a Tonner Matt or Mortimer ~ though it’s a little big on Matt.

102_7310

Next is a 4 piece gown set to fit Tonner/Wilde Imagination Ellowyne. Now that I have a resin gal, I think she may be my new favorite for which to sew! She is very well strung, so poses great. This set is composed of the gown, a tulle petticoat, a choker train with snap-on rose button & chiffon strips, and a snap-on choker capelet that snaps onto the train and ties in the back. The strips of the train can also be used as a scarf/hood if wished. I am very happy with how the ruffles turned out. It was a very tedious experiment, and I’m glad it worked as I had hoped! I was surprised at how sewing the white chiffon onto the white satin was just as tiring as sewing black on to black! I have had some collectors order custom items in a lot of black, and my eyes get VERY tired after a while. While working on this gown I found the same to be true with the white. Only this time, instead of being hard to see for darkness, it was hard because the white reflects the lamplight! All in all, it was amusing to me. Still, I love the end result.

The next is still in progress. I need to finish by adding the snaps & buttons. It’s a sport jacket for Tonner Matt.

0919170826

I am also working on more outfits for the paper doll, El, so may get them finished & posted later this weekend. I love getting projects finished! For now, I think it’s time to cook up some lunch. Wishing you all a wonderful & productive day!